Overview
The Taxonomy Service is an intuitive, self-service tool designed to help teams efficiently create, update, and manage taxonomies. With its streamlined version management feature, users can easily track changes and ensure consistency across multiple versions of taxonomy-related tasks. By providing a unique identifier for each taxonomy, this tool guarantees that your data is always properly labeled and organized. Whether you’re managing simple annotations or complex tasks like Lidar segmentation, the Taxonomy Service simplifies the process, so you can focus more on accuracy and less on manual management. It ensures that every step in your workflow, from data labeling to final version tracking, is handled seamlessly, reducing errors and maintaining high standards across your operations.Supported Task Types
Currently, Taxonomy Service supports the following task types:- Segment Annotation
- LidarAnnotation
- Lidar TopDown
- LidarLinking
- LidarSegmentation
- VideoAnnotation
- ImageAnnotation
- Sensor Fusion
Taxonomy SRN
A Taxonomy SRN (Service Resource Name) is a unique identifier for a specific taxonomy version. It allows you to compare and track different versions of taxonomies across tasks ensuring consistency and accuracy for your labeling requirements. Format srn:scale:avcv:taxonomy:taxonomy:\<projectId\>/\<name\>/\<version\>/\<hash\>
Example
srn:scale:avcv:taxonomy:taxonomy:654dd0785yytd22829f342hs/user_myproject_lidar_test/v1/0ac7578c6b32107816e071aa11353bab61bb6h1f
Task Creation Process
When Taxonomy Service is enabled on your project, tasks that are created will automatically be updated with the latest taxonomy that was published using Taxonomy Service. Therefore, you can remove taxonomy JSON during the task creation process. Note, that if you keep the taxonomy JSON in the task creation API call, the** taxonomy JSON will override** any taxonomy published using Taxonomy Service.Dependent Tasks
Each dependent project must have its own taxonomy defined in Taxonomy Service. For example, if you have a LidarAnnotation project and dependent LidarLinking and Lidartopdown projects, each must have its taxonomy defined separately in Teddy.Dependent projects
Taxonomy Service supports dependent projects, managing their taxonomies automatically. Ensure each project is set up with its own taxonomy, and remove any taxonomy-related parameters from the scripts and task parameters.Tracking
Use the Taxonomy Metrics tool to review and monitor where the Taxonomies and policies were applied.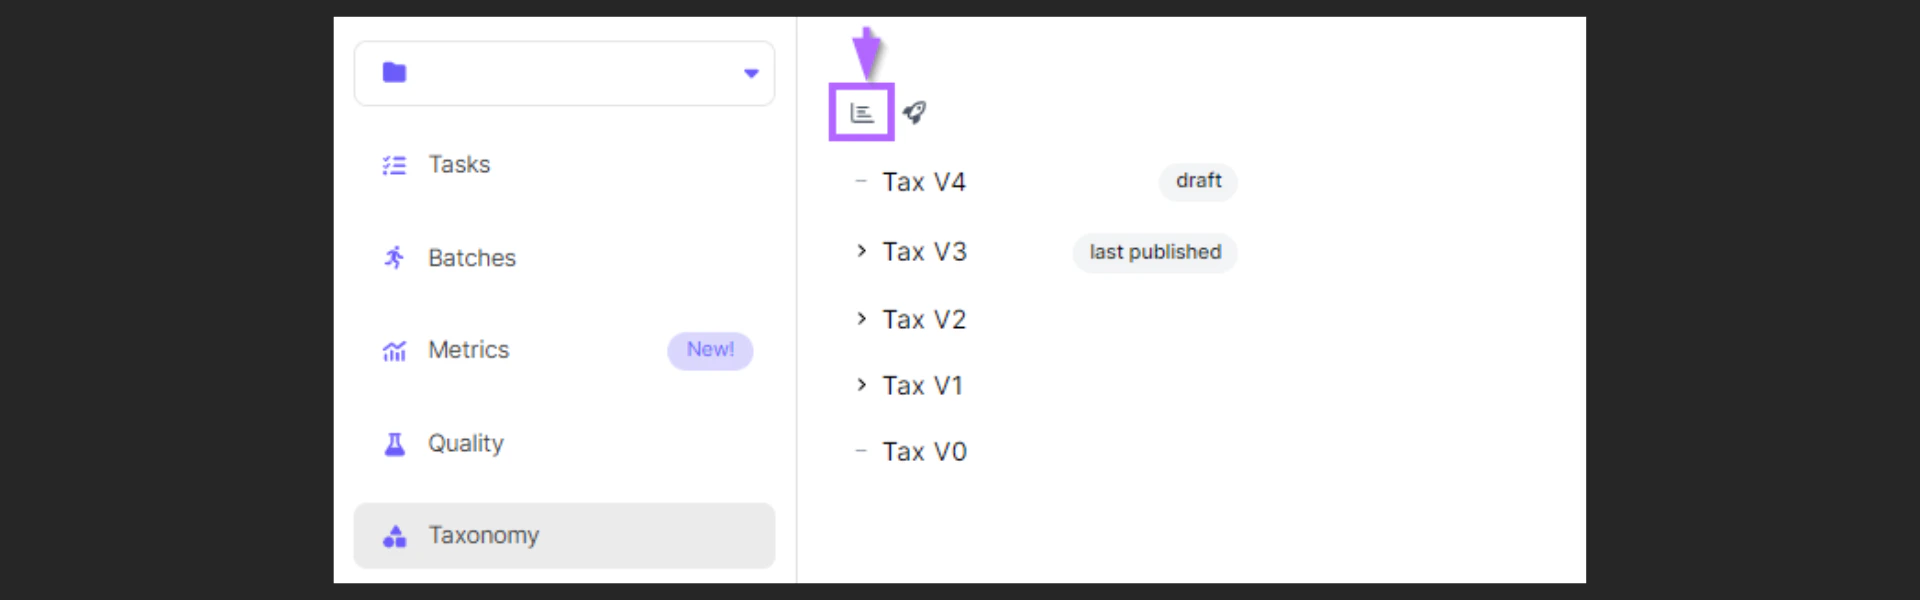
Getting Started
Access
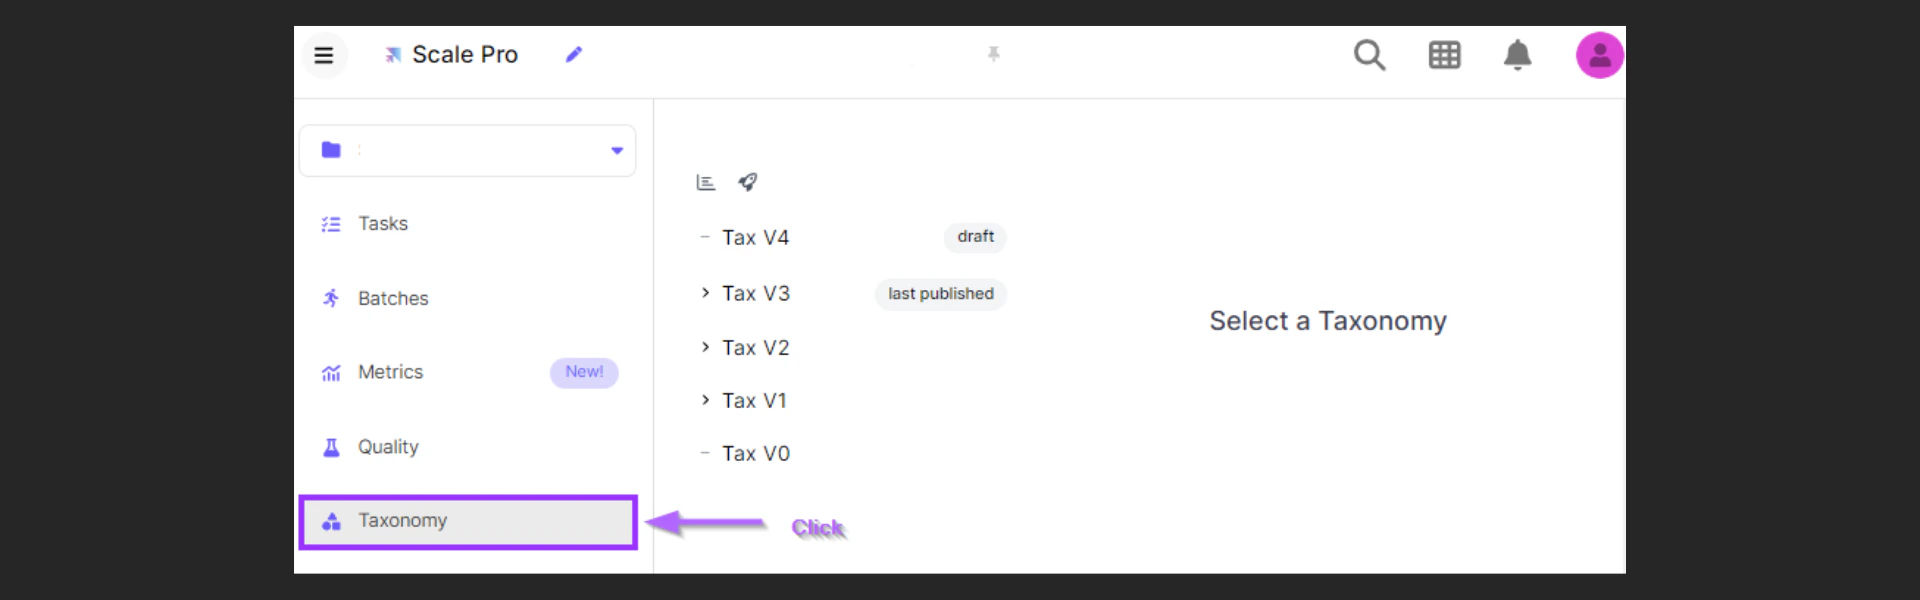
You can access the Taxonomy Service from the Scale dashboard page on the left panel for each project that is enabled.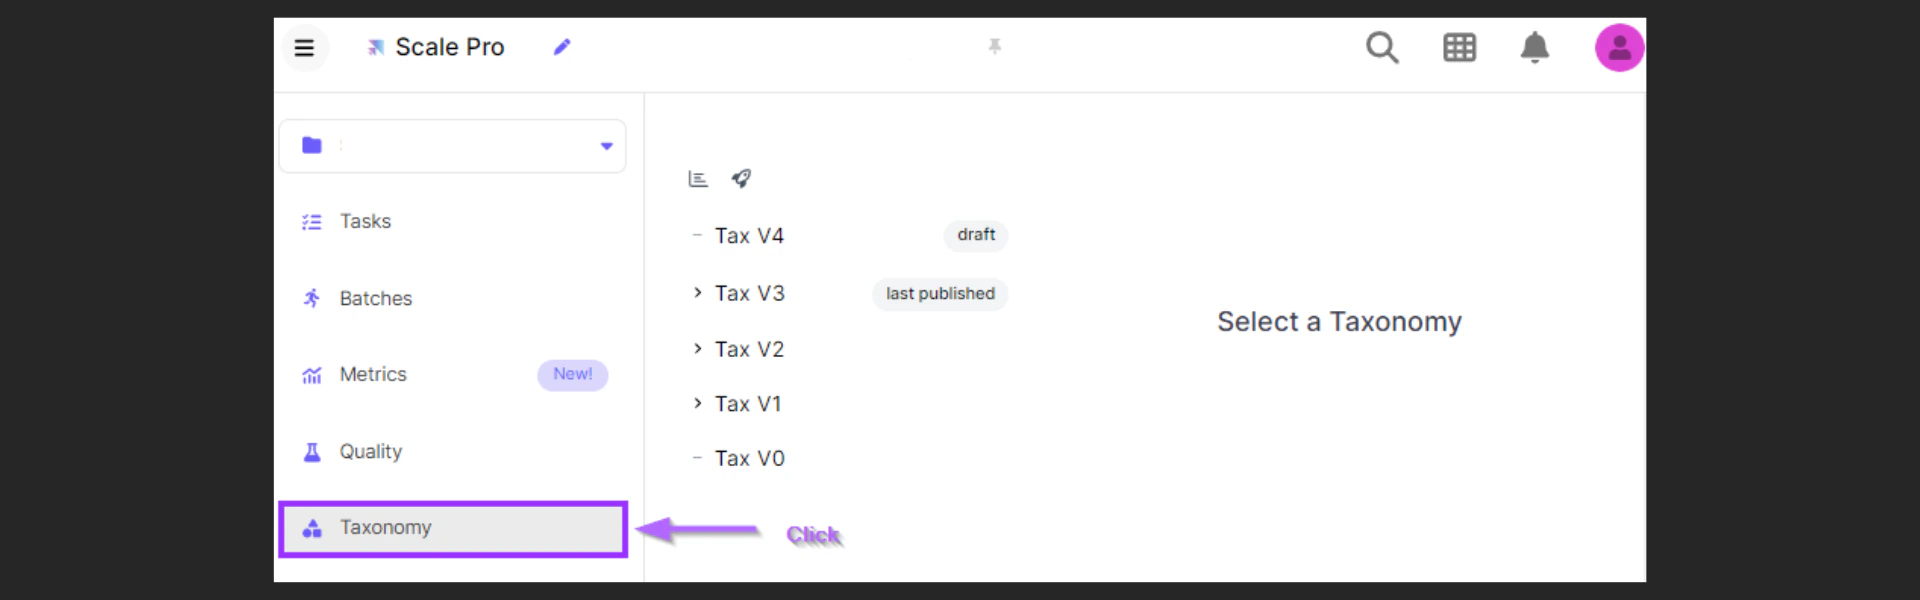
Set Up
Create and publish a taxonomy using the Taxonomy Editor. Reference the Section “How to use the Taxonomy editor for further details” Ensure to ask your account manager to enable the “Pull last published Taxonomy when creating Tasks” property in the project configurations to allow auto-pulling of the latest taxonomy.Adding annotations
- Access the Taxonomy Editor from the project dashboard page.
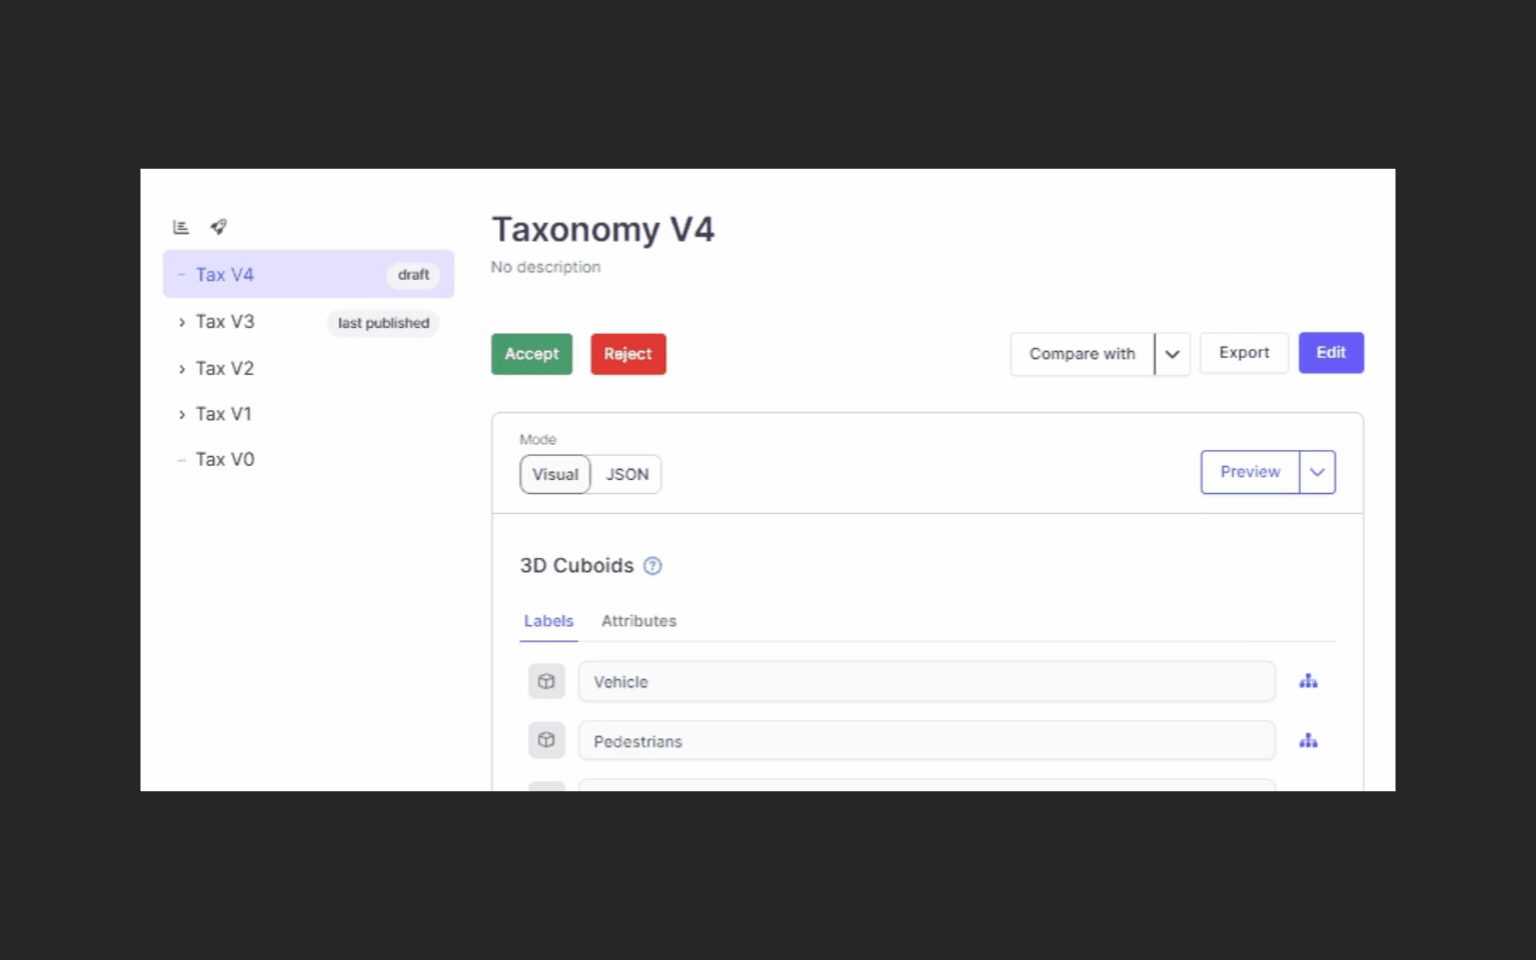
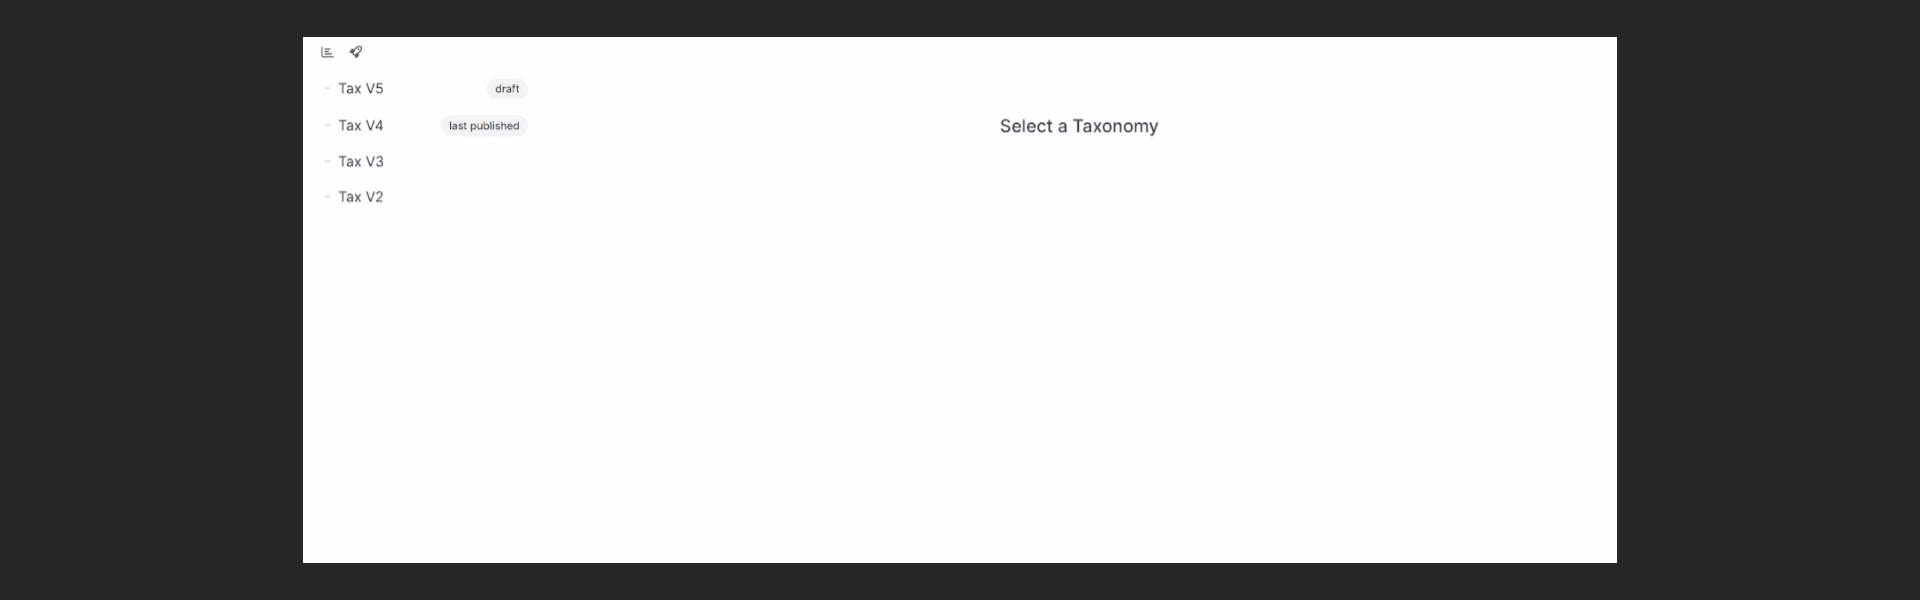
- Once on Taxonomy Service, you will see on the left sidebar a list of all current Taxonomies versions, only the current draft is editable, and all previously published versions are static and cannot be edited.
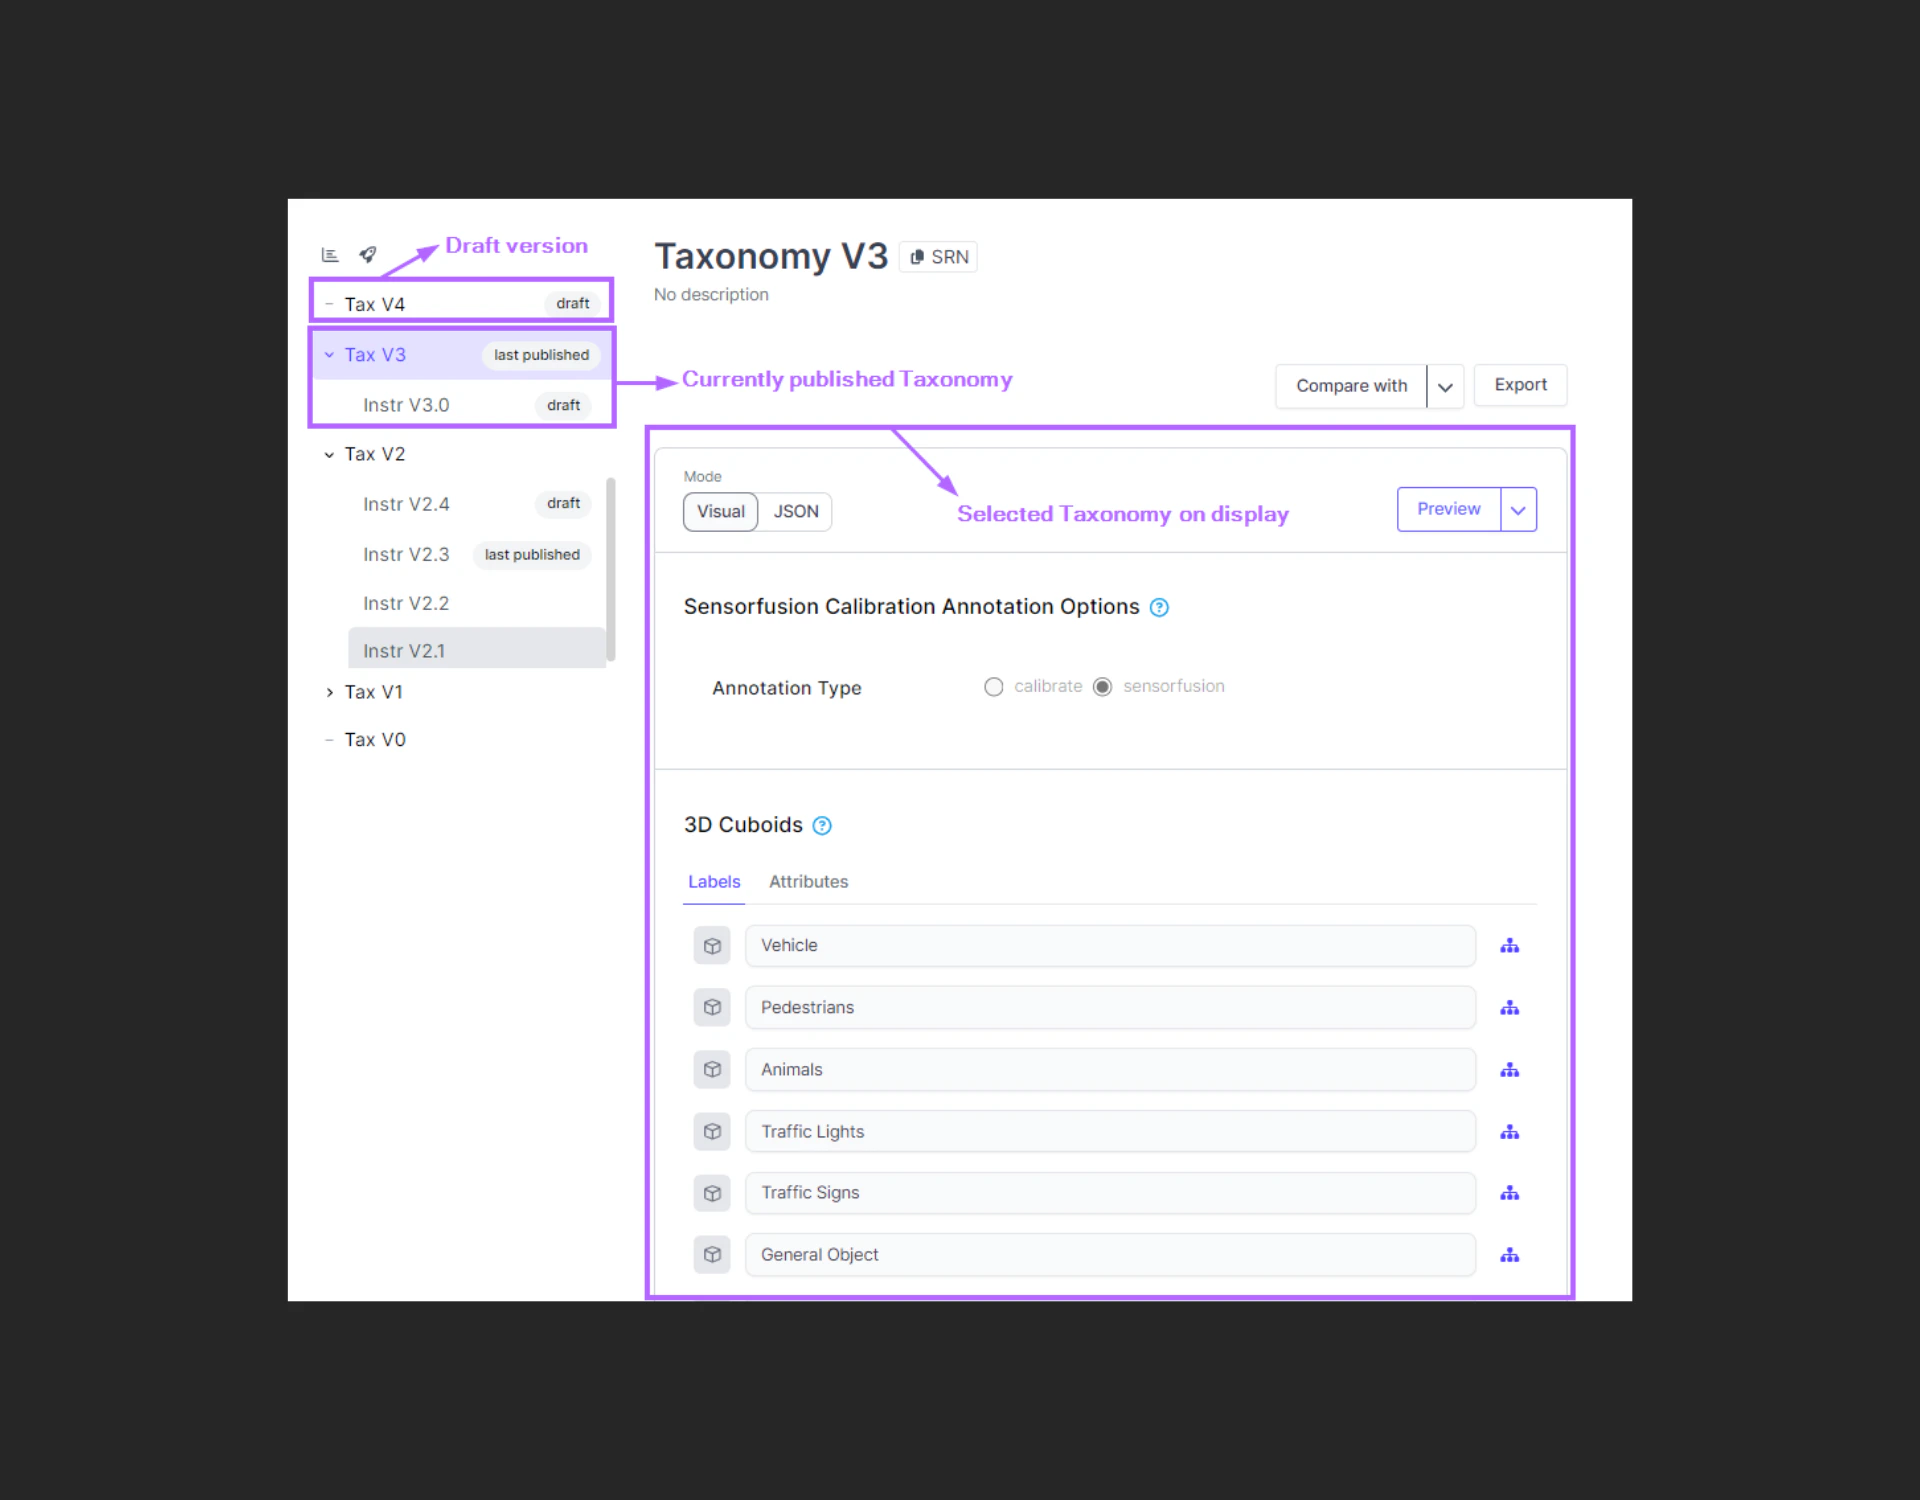
- To work on changes we need first to select our current Taxonomy version that in on draft, for this click on the Taxonomy with a Draft status as next:

- Once you have selected your draft, you will see the Taxonomy details will appear on the right side of the screen, on top being our main edit controls and on the below part our taxonomy details.

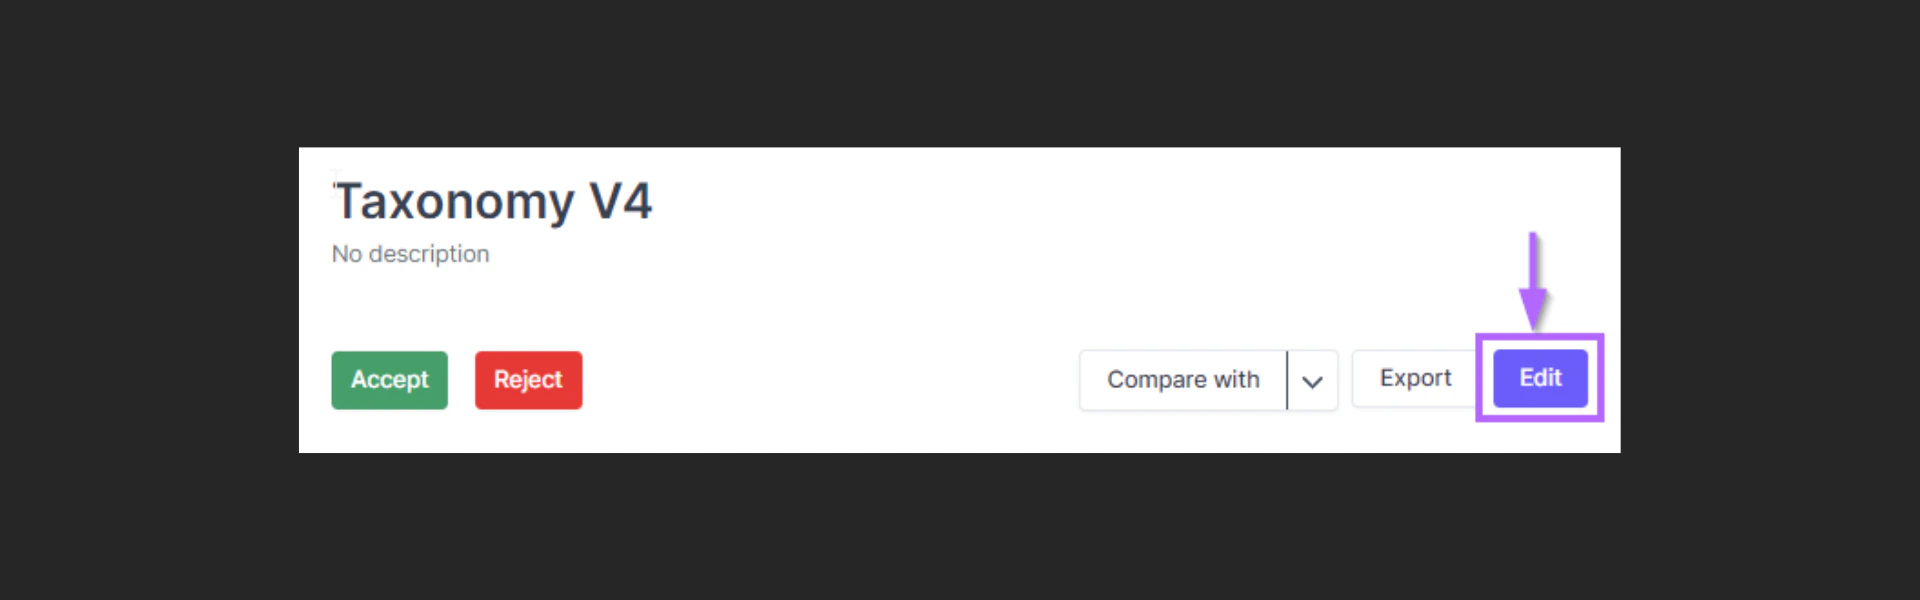
- By default this view will not allow us to edit the taxonomy, in order for us to be able to edit first we need to click on the “Edit” button on our Editor tooling
- Now we are on the editor view! Lets try now to add a new label:
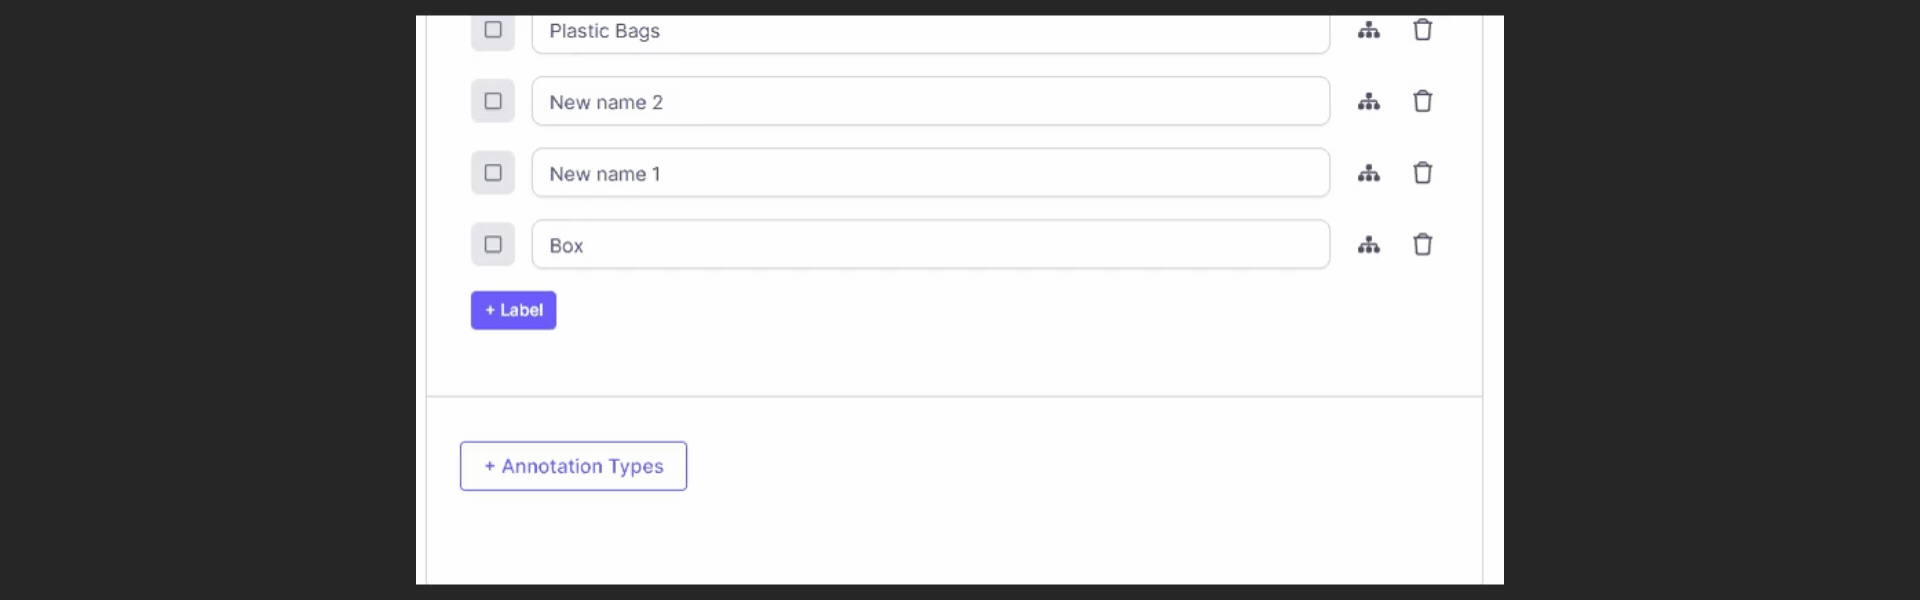
- First lets click on the + Label button, this will add a new base label that we can modify.
- You will see a new Label appear under the current existing list with the name** new-label-#**

- To change the new label name just click on it, and type the new name you will want. You can also modify other label names with the same process just click on the label you want to adjust
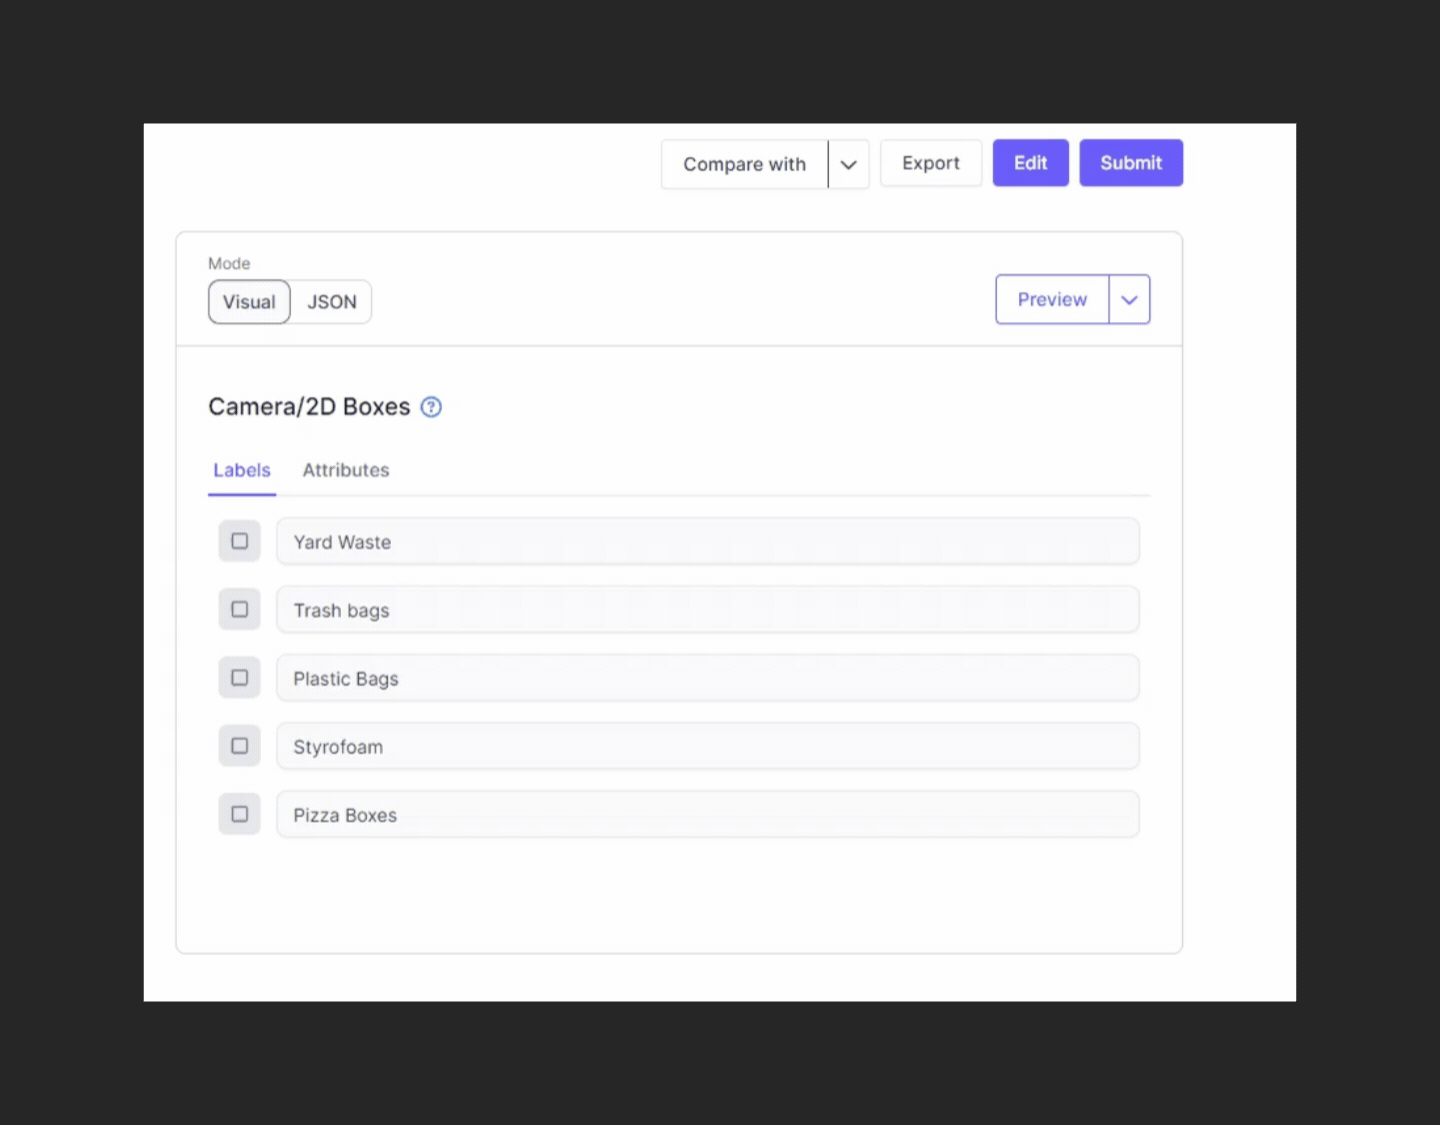
- To delete a label just click on the Trash bin button on the right side of any label previously added.
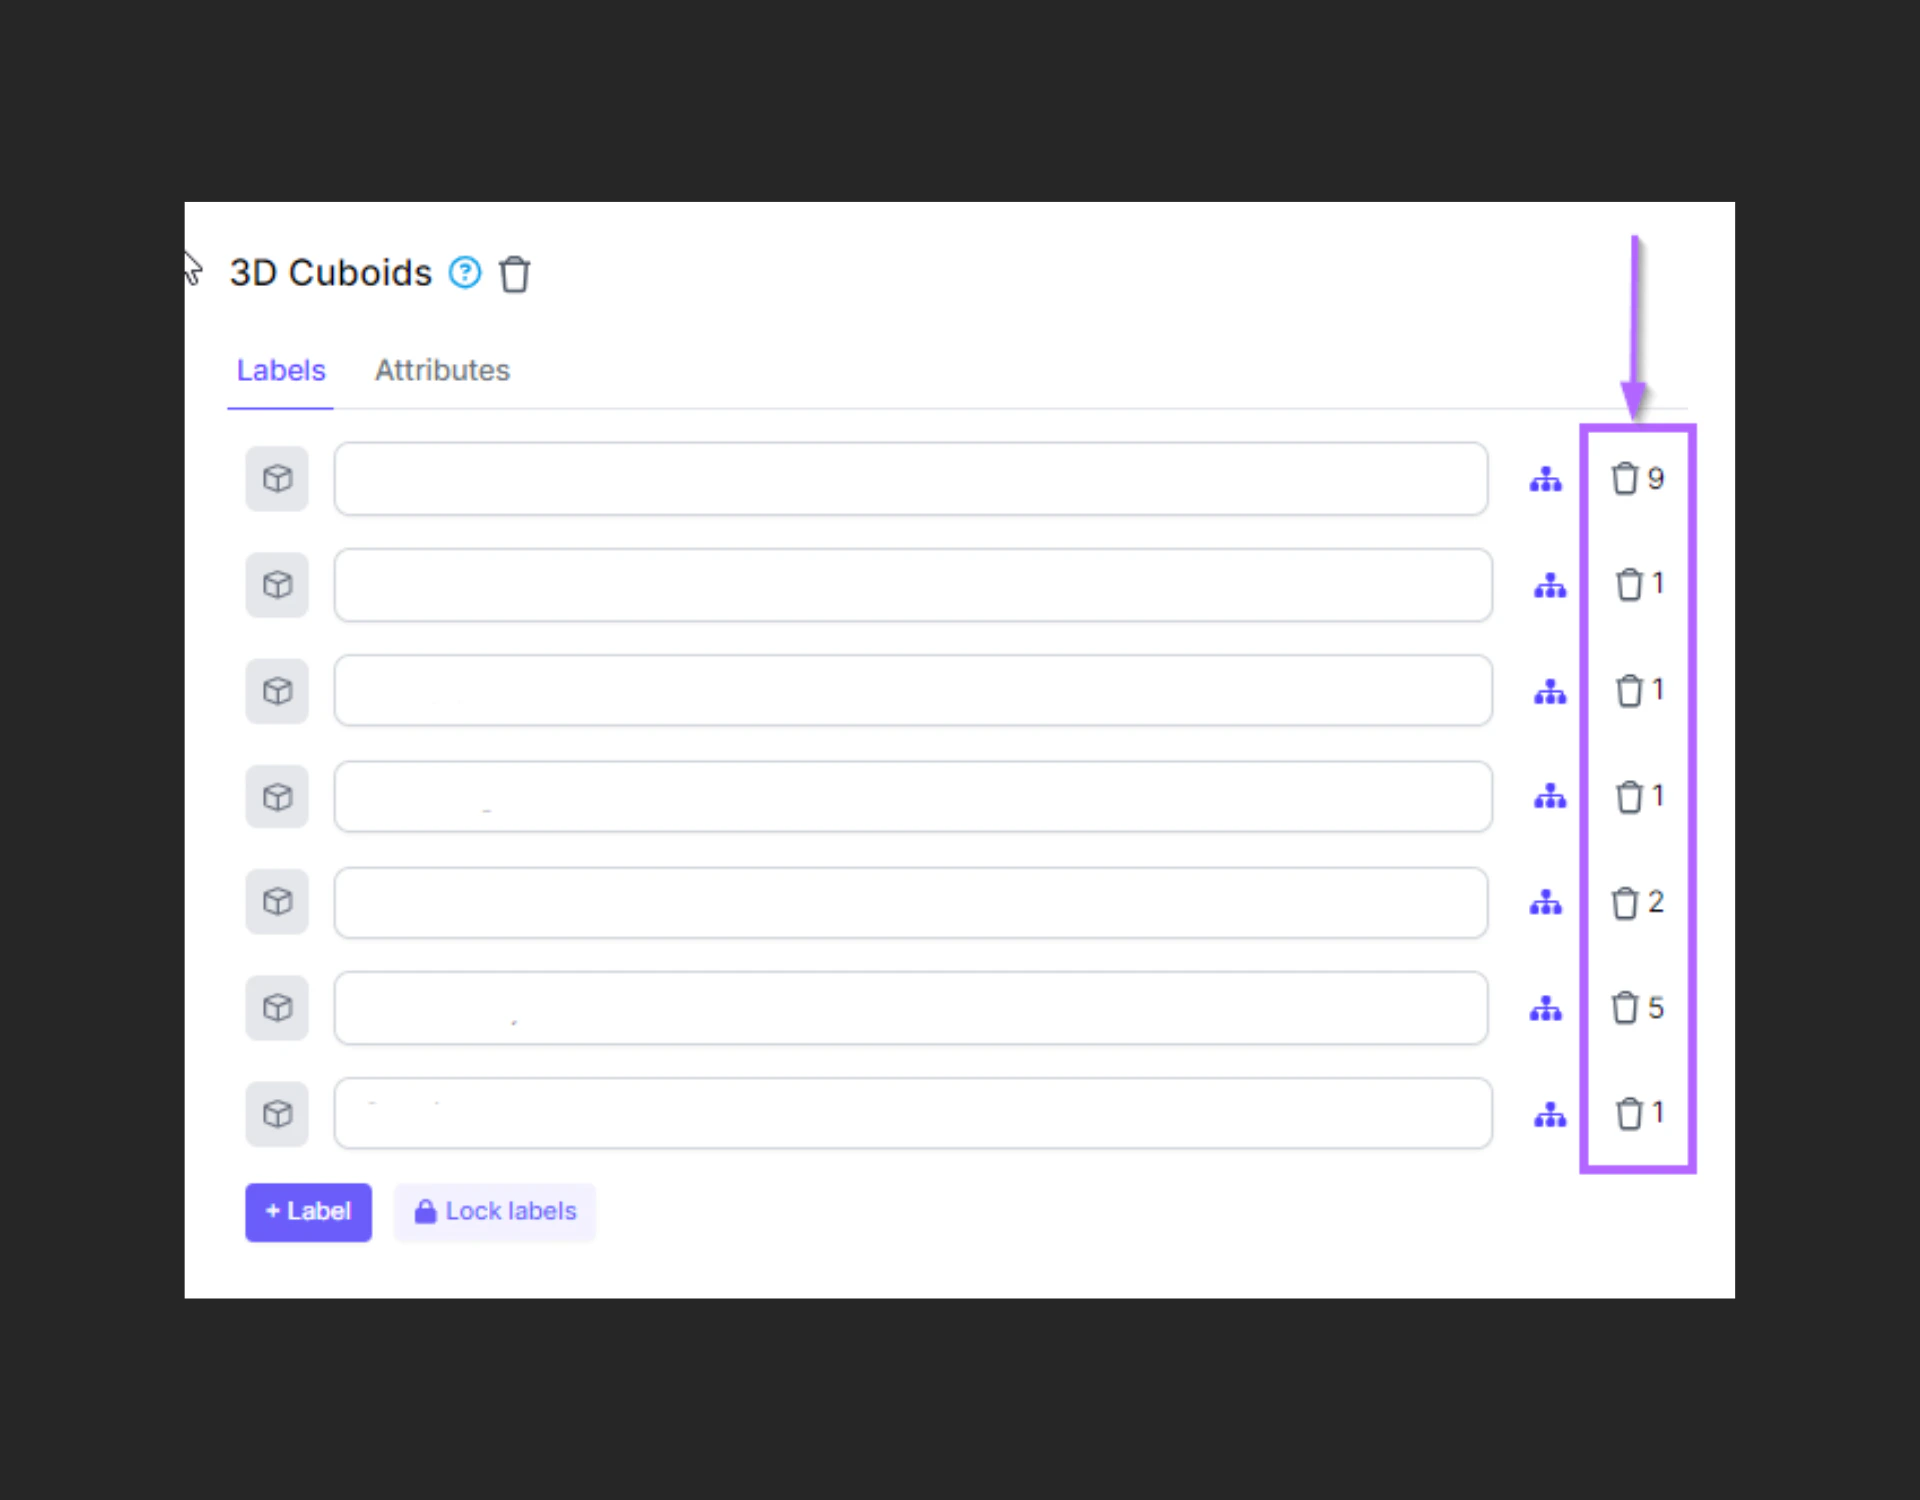
- Now let’s review how we can add Leaf labels, this is very straightforward, to get started let’s first click on the add child button on the right side of our label:
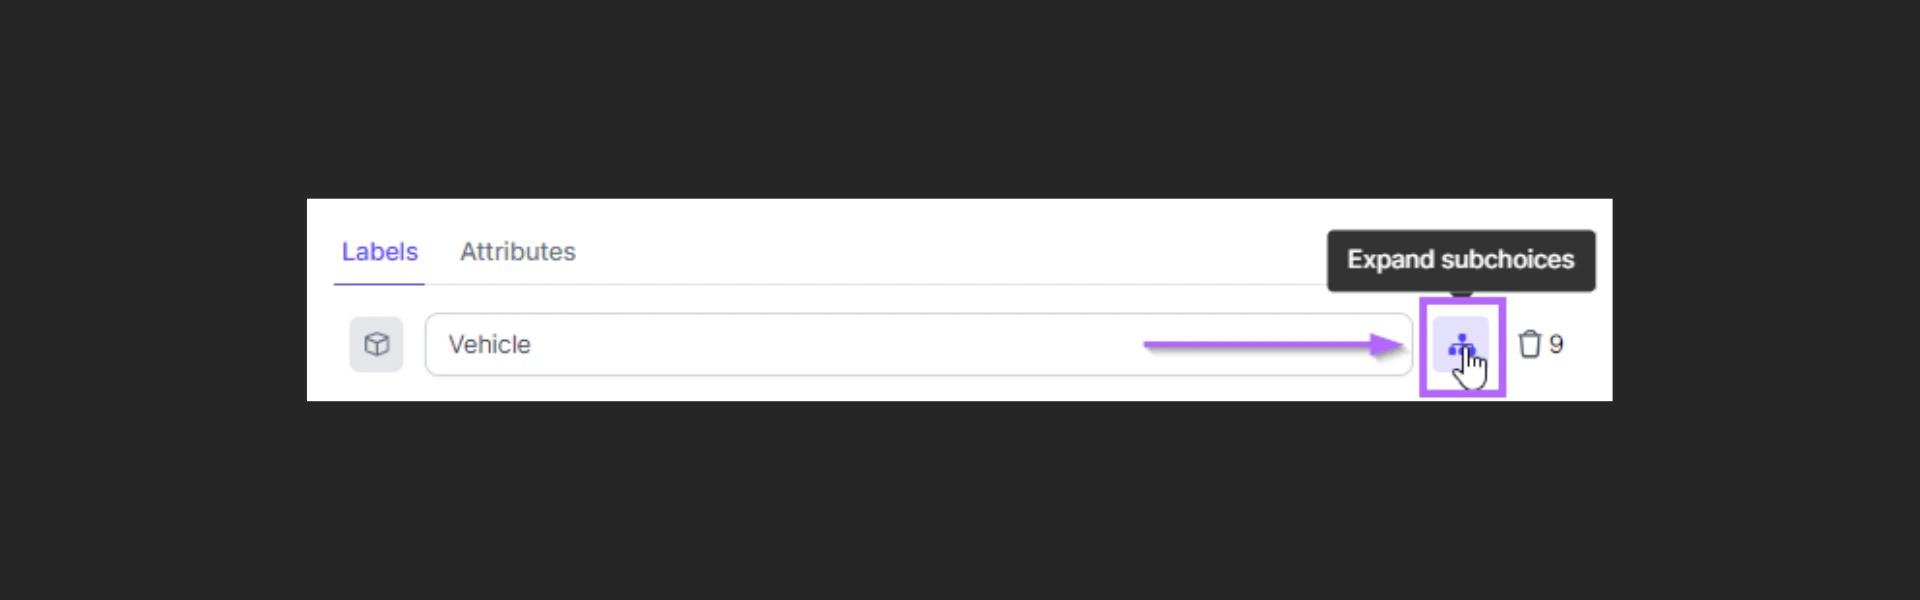
- Once you have added a new leaf label, we can go ahead and rename them as needed. Note that you can also add multiple leaf labels as shown next:
- Now that we have added a label lets review how to add an attribute for them.
Adding Attributes
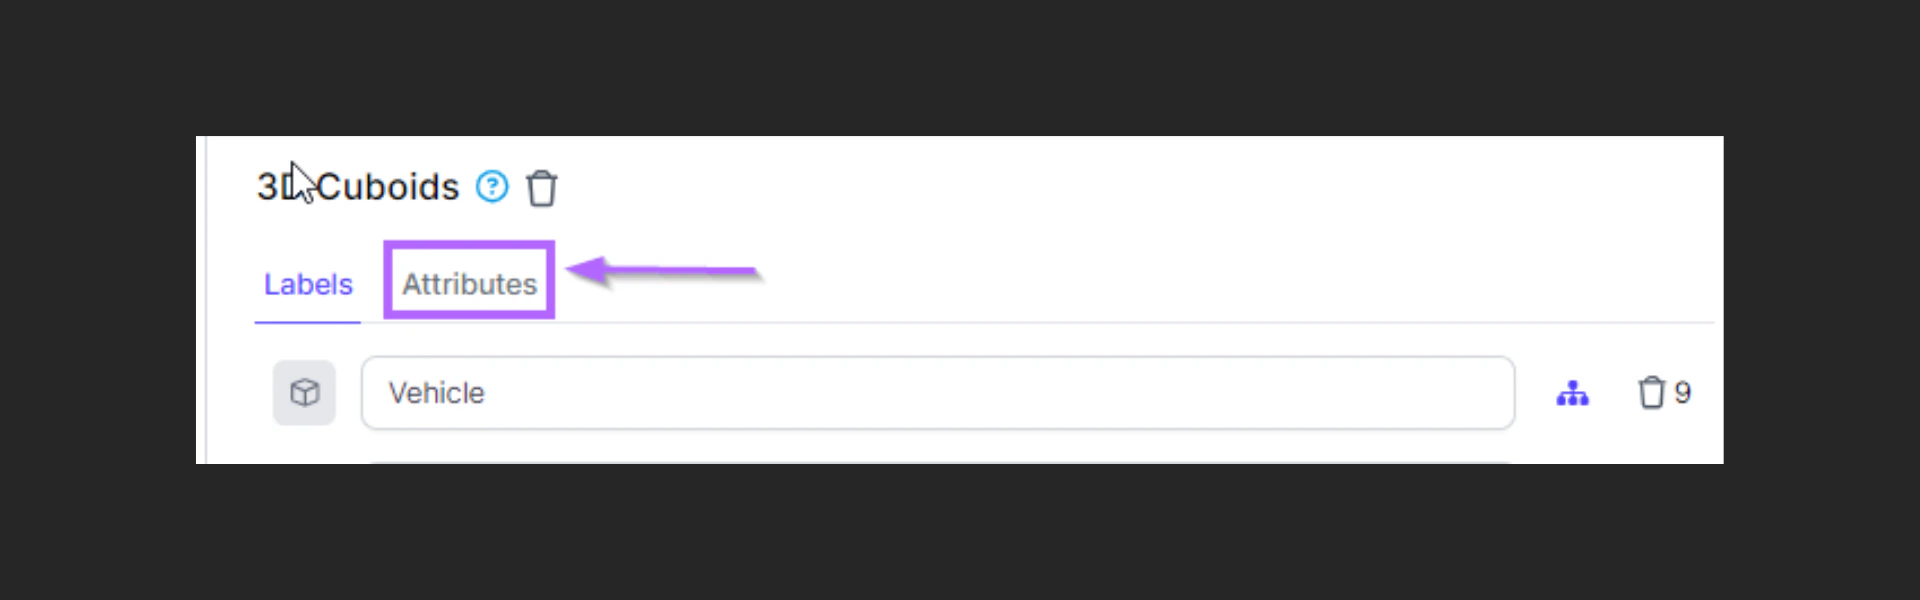
The process of adding attributes is very similar to adding an annotation, the next steps show how to add an attribute and some of their main setups we need to take into account:- First, we need to get into the Attribute view as next, clicking on the Attributes tab above our Taxonomy view as next:
- Once we are on the Attribute view, you will see any previously added attribute listed, in addition, we can add a new Attribute by clicking on the button + Attribute.
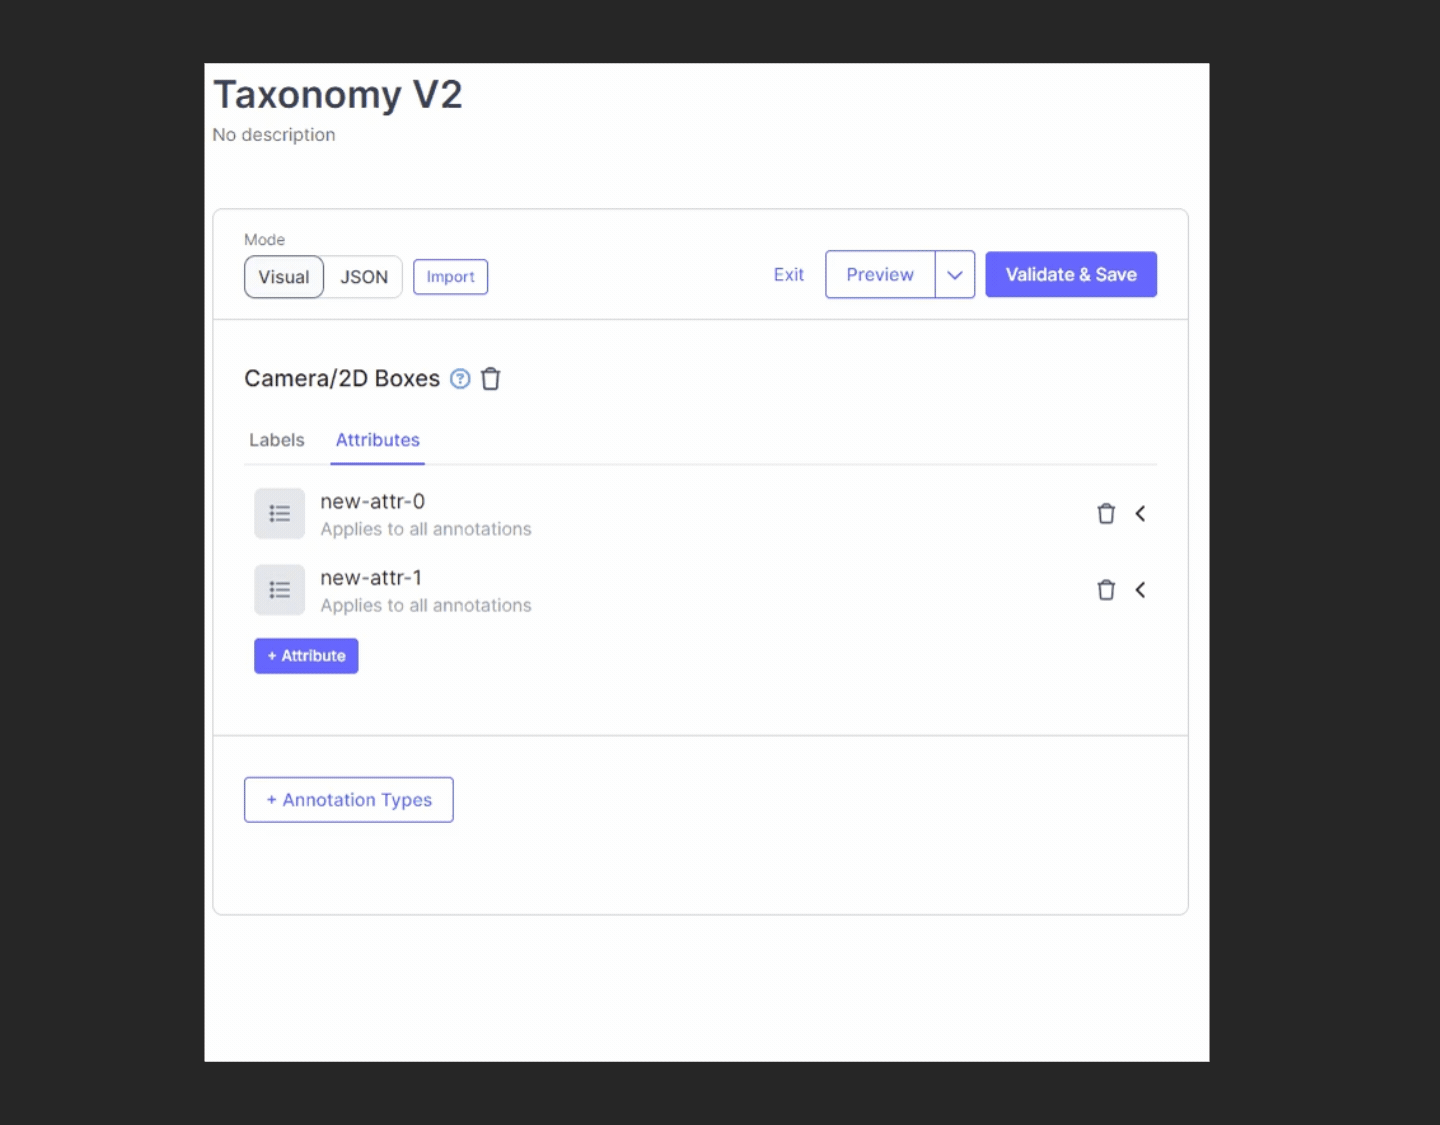
- Now that we have added a new attribute it is important to set its values on how it will work, the most common setup options we will have are as next:
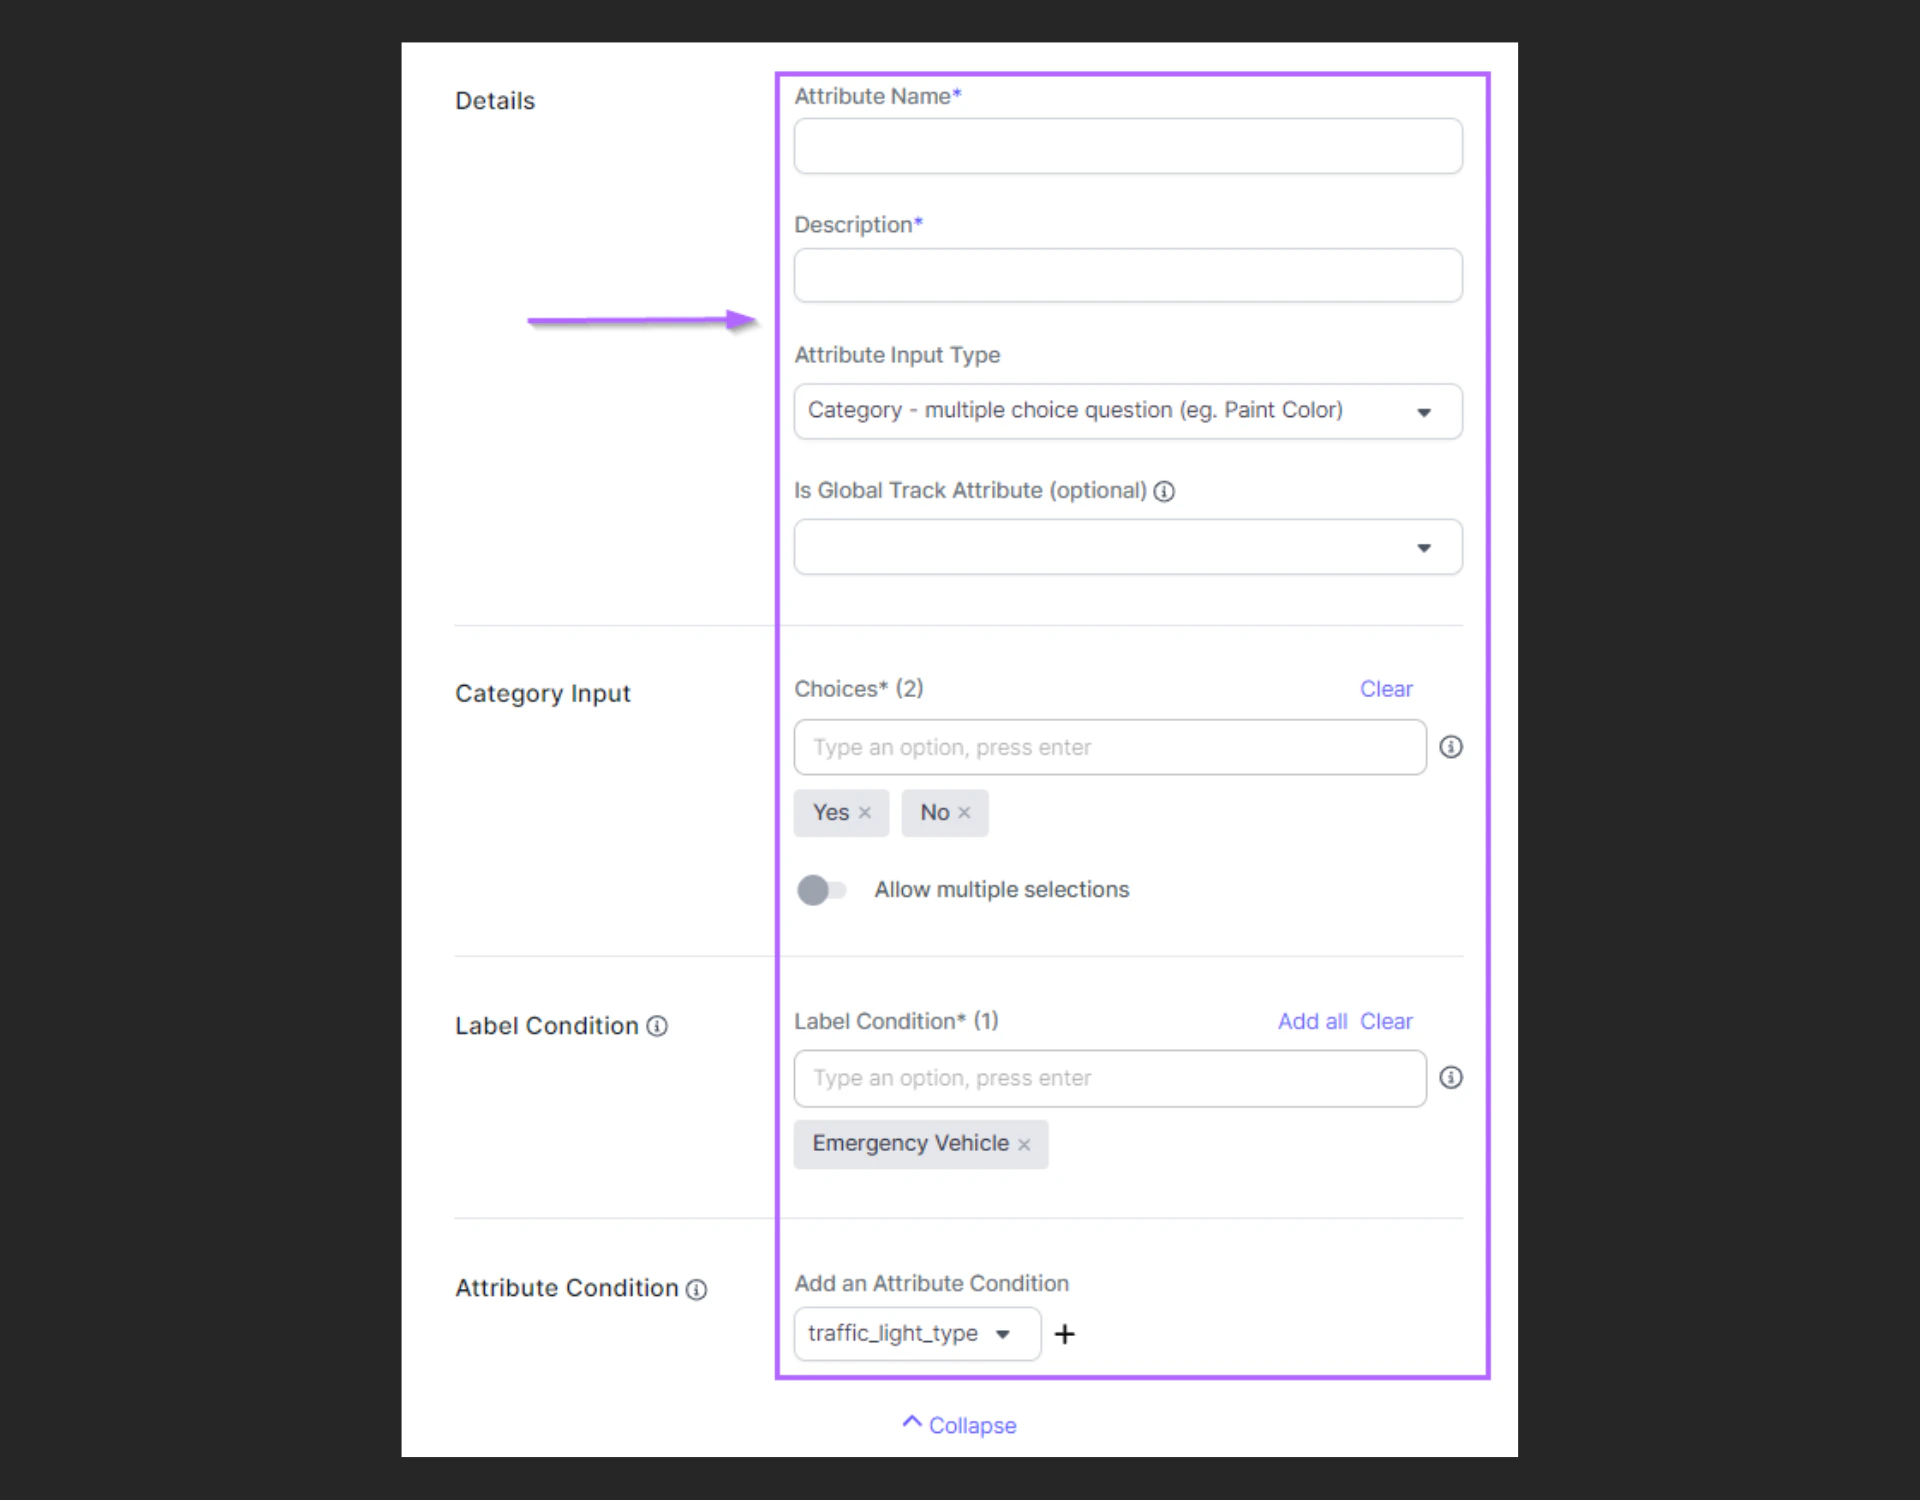
- Details: General Attribute information
- Attribute Name: Display the name of the attribute to labelers.
- Description: Description for attribute available for labelers.
- Attribute Input type: This would vary depending on the task type but it sets how the attribute values would be entered:
- Category: Multiple choice input
- Angle: Heading in degrees. ( eg. Sign direction )
- Number: Any numerical input
- Text: Open text input
- Linked: Link to another annotation present.
- Label Condition: To which label in specific this attribute be applied, if left empty applies to all labels.
- Attribute condition: Used when the current attribute depends on another attribute value, you need to reference the other attribute in addition to the value expected for it.
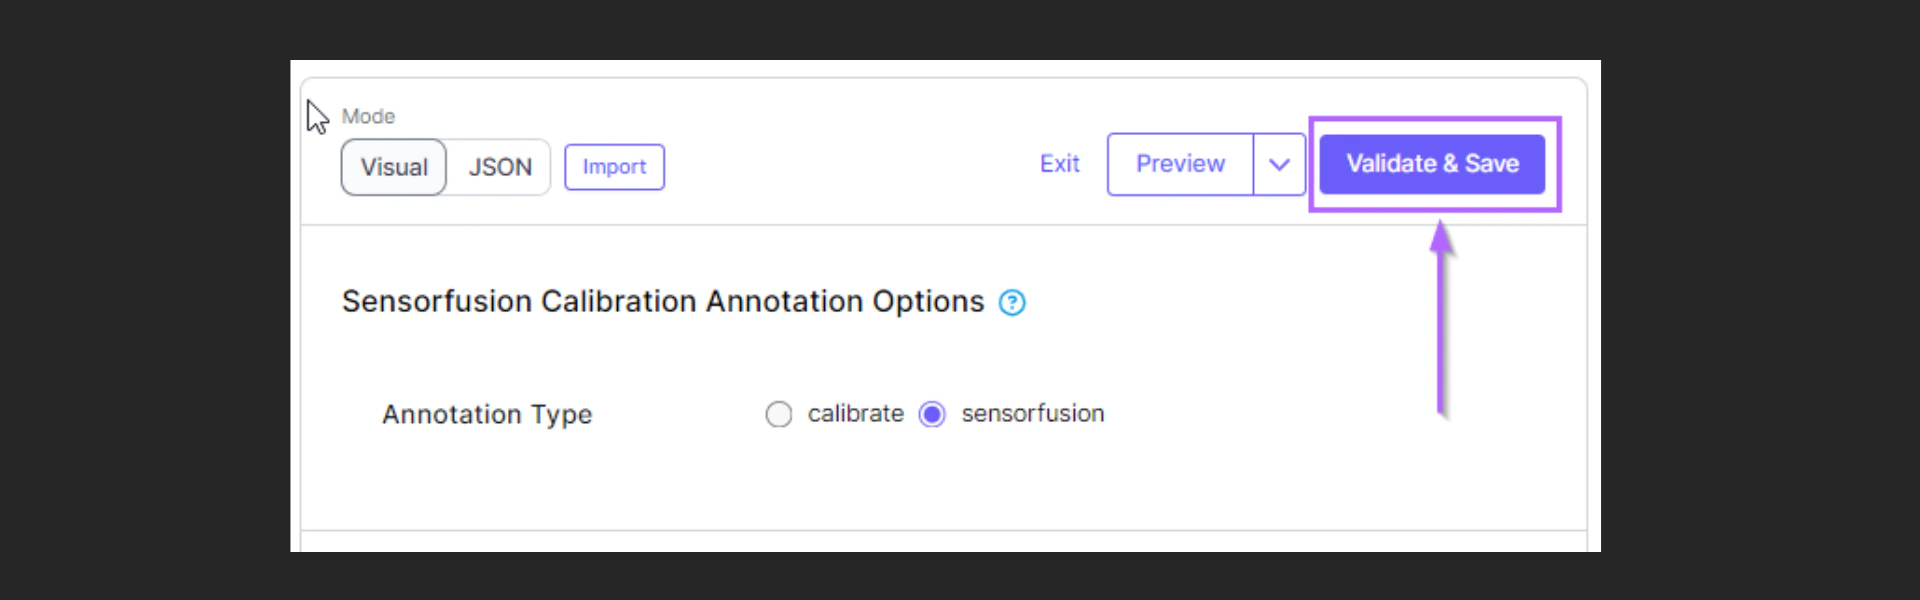
Publishing
Create a draft taxonomy, review and make necessary changes, and publish it when ready. Published taxonomies are automatically used for new tasks. Each time you publish a new version of the taxonomy, a new draft will be created where you can work on new changes, and the published version will be locked.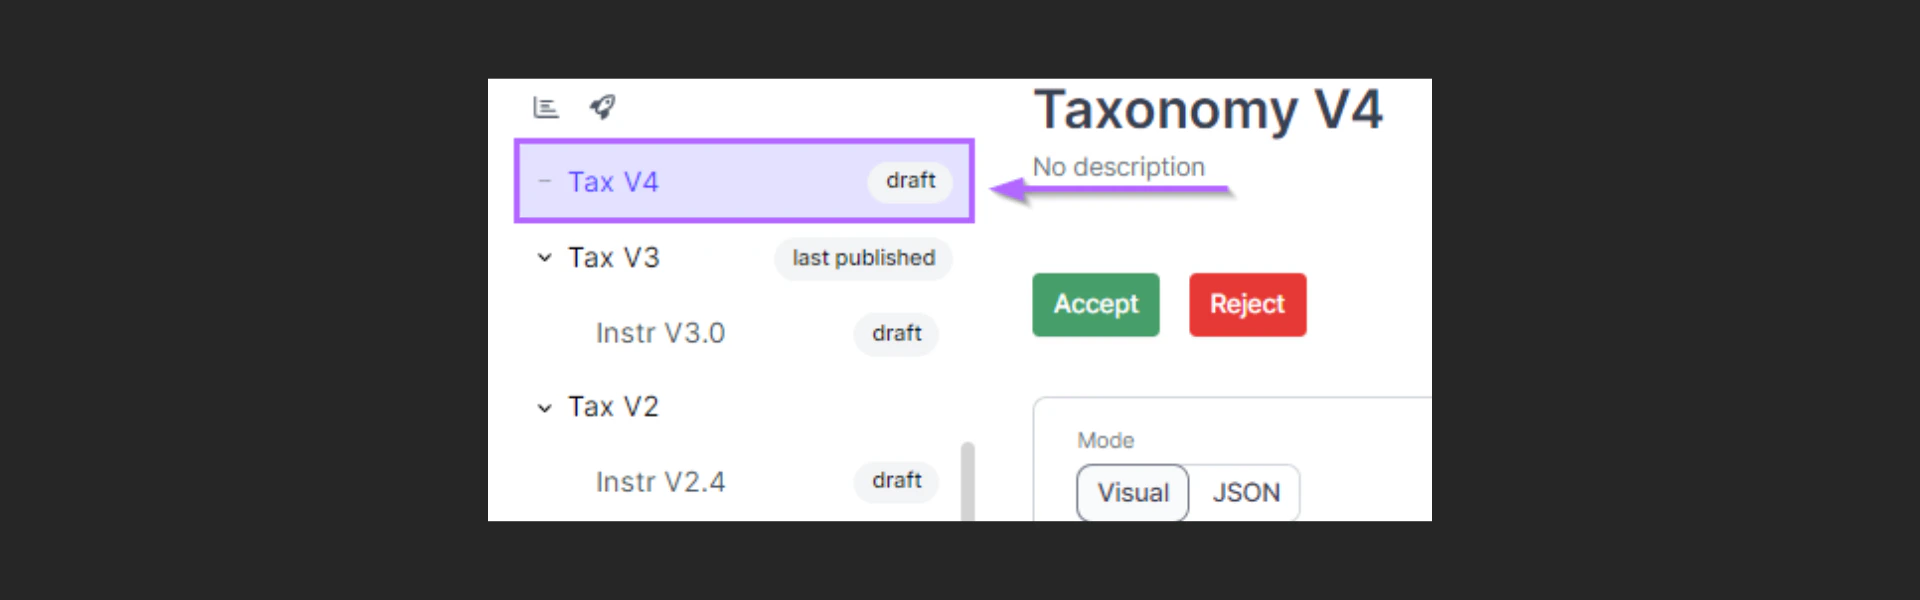
Proposal and Reviews
You can review taxonomies and submit proposals for changes. The Scale team will review these proposals and implement approved changes, ensuring that taxonomies remain up-to-date and accurate.- When you submit a taxonomy, Scale will be able to analyze the changes and reject this proposal.
-
When Scale submits a taxonomy, you will be able to review, accept, or reject changes.